【Unity・C#】コルーチンについてまとめる
今回はコルーチンについてまとめます。
使えるようになると非常に便利!

対応表
主要なものだけまとめます。 using System.Collections;を使用します。
コルーチンの開始・停止
| 関数 | 説明 |
|---|---|
| Coroutine StartCoroutine(IEnumerator routine); | 引数のコルーチンの開始 |
| void StopCoroutine(IEnumerator routine); | 引数のコルーチンの終了 |
| void StopAllCoroutines(); | 全コルーチンの終了 |
戻り値
| 戻り値 | 説明 |
|---|---|
| yield return null; | 1フレーム中断 次フレームで下の行から再開 |
| yield return new WaitForSeconds(float seconds); | 引数に入れた「seconds」秒中断 秒数後、再開 |
| yield break; | このコルーチンの終了。(再開不可) |
| yield return new WaitUntil(Func predicate); | predicateの戻り値が trueなら再開 |
| yield return new WaitWhile(Func predicate); | predicateの戻り値が falseなら再開 |
| yield return StartCoroutine(); | 引数のコルーチンが終了するまで中断 |
コルーチンとは?
コルーチン(Coroutine)はそもそも何?というお話から。
かなりざっくり説明すると、コルーチンは関数の中断・再開が可能になる関数です。
MonoBehaviourを継承しているクラスで扱えます。
A coroutine allows you to spread tasks across several frames. In Unity, a coroutine is a method that can pause execution and return control to Unity but then continue where it left off on the following frame.
コルーチン - Unity マニュアル
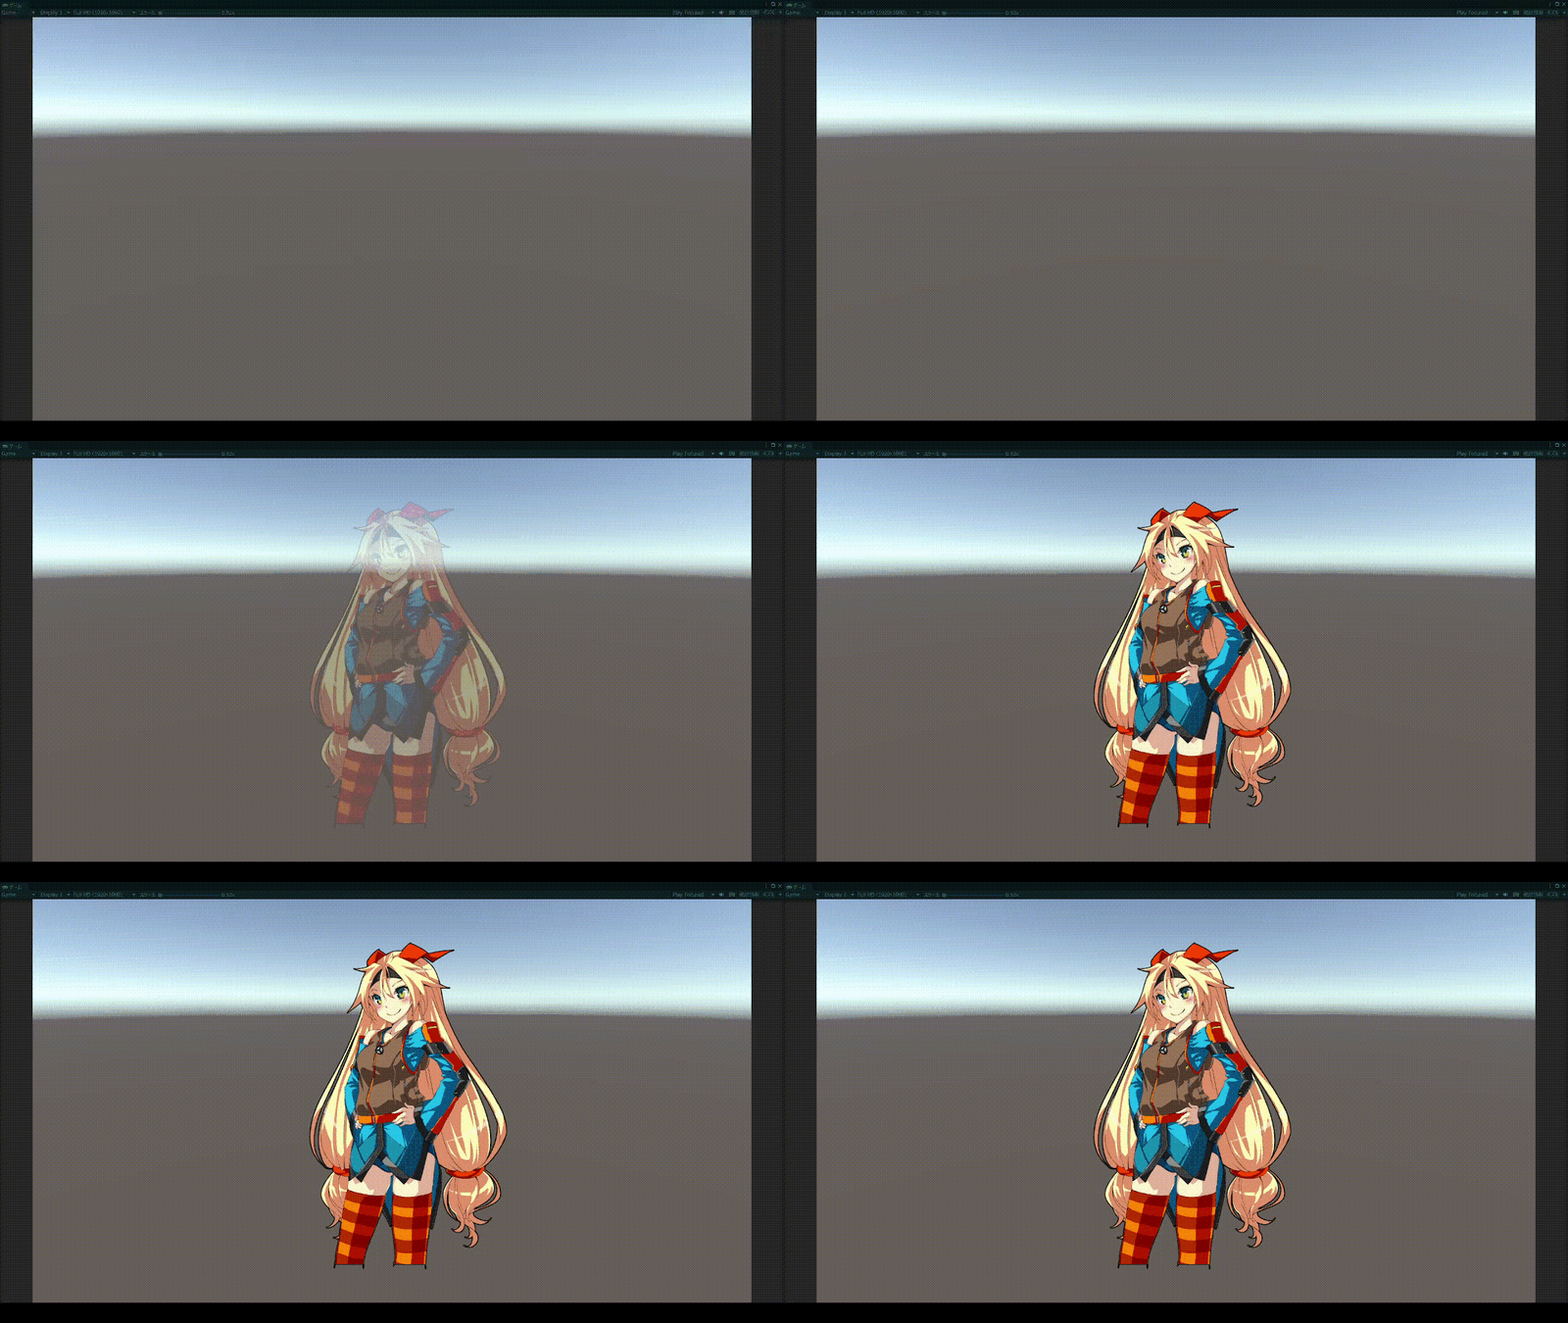
例えば、徐々に、画像の透明度を上げていく処理を作るとします。

以下のコードのUpdate()関数に注目してください。
これは意味がありません。
1フレーム内でalphaが1.0fになってしまうためです。
using UnityEngine;
using UnityEngine.UI;

/// <summary> 画像の透明度を上げるサンプル </summary>
public class CoroutineExample : MonoBehaviour
{
    //-----------------------------------------------------------------------
    // メンバ変数
    //-----------------------------------------------------------------------

    /// <summary> 画像UI </summary>
    private Image m_image = null;

    /// <summary> 透明度 </summary>
    private float m_alpha = 0.0f;

    //-----------------------------------------------------------------------
    // Unityメゾット
    //-----------------------------------------------------------------------

    /// <summary> 初期化処理 </summary>
    private void Start()
    {
        m_image = GetComponent<Image>();
        m_image.color = new Color(1.0f, 1.0f, 1.0f, m_alpha);
    }

    /// <summary> 更新処理 </summary>
    private void Update()
    {
        if (m_alpha <= 1.0f)
        {
            // 画像の透明度を上げていく処理
            for (float alpha = 0.0f; alpha <= 1.0f; alpha += 0.1f)
            {
                m_alpha = alpha;
                m_image.color = new Color(1.0f, 1.0f, 1.0f, m_alpha);
            }
        }
    }

}
コルーチンを使うと以下のように書いて実装できます。
using System.Collections;

using UnityEngine;
using UnityEngine.UI;

/// <summary> 画像の透明度を上げるサンプル </summary>
public class CoroutineExample : MonoBehaviour
{
    //-----------------------------------------------------------------------
    // メンバ変数
    //-----------------------------------------------------------------------

    /// <summary> 画像UI </summary>
    private Image m_image = null;

    /// <summary> 透明度 </summary>
    private float m_alpha = 0.0f;

    //-----------------------------------------------------------------------
    // Unityメゾット
    //-----------------------------------------------------------------------

    /// <summary> 初期化処理 </summary>
    private void Start()
    {
        m_image = GetComponent<Image>();
        m_image.color = new Color(1.0f, 1.0f, 1.0f, m_alpha);

        // コルーチンの開始
        StartCoroutine(AlphaFade());
    }

    //-----------------------------------------------------------------------
    // コルーチンメゾット
    //-----------------------------------------------------------------------

    /// <summary> 透明度を上げるコルーチン </summary>
    private IEnumerator AlphaFade()
    {
        // 画像の透明度を上げていく処理
        for (float alpha = 0.0f; alpha <= 1.0f; alpha += 0.1f)
        {
            m_alpha = alpha;
            m_image.color = new Color(1.0f, 1.0f, 1.0f, m_alpha);

            // この行で中断、1フレーム後に次の行から再開
            yield return null;
        }
    }

}
using System.Collectionsを記述し、IEnumerator型で関数を作ります。
処理を止めたいタイミングでyield return null;を呼びます。
yield return null;は、この行に来た時に処理を中断し、
次のフレーム(1フレーム後)に下の行から再開します。
一時中断し、次のフレームで下の行から再開する、というのがミソです。
StartCoroutine();の引数にIEnumerator型で関数を入れると、処理が走るようになります。
使いどころ
上記の例や、UnityDocumentationの例では、
あまりコルーチンの良さを活かし切れていないと思います。
徐々にアルファ値を上げていくなら、
クラス内で時間用の変数を作って毎フレーム上げていけばよいです。
using UnityEngine;
using UnityEngine.UI;

/// <summary> 画像の透明度を上げるサンプル </summary>
public class CoroutineExample : MonoBehaviour
{
    //-----------------------------------------------------------------------
    // 定数
    //-----------------------------------------------------------------------

    /// <summary> 時間 </summary>
    public const float TIME = 1.0f;

    //-----------------------------------------------------------------------
    // メンバ変数
    //-----------------------------------------------------------------------

    /// <summary> 画像UI </summary>
    private Image m_image = null;

    /// <summary> 透明度 </summary>
    private float m_alpha = 0.0f;

    /// <summary> カウント </summary>
    private float m_timer = 0.0f;

    //-----------------------------------------------------------------------
    // Unityメゾット
    //-----------------------------------------------------------------------

    /// <summary> 初期化処理 </summary>
    private void Start()
    {
        m_image = GetComponent<Image>();
        m_image.color = new Color(1.0f, 1.0f, 1.0f, m_alpha);
    }

    /// <summary> 更新処理 </summary>
    private void Update()
    {
        if (m_alpha <= 1.0f)
        {
            m_timer += Time.deltaTime;

            if (m_timer >= TIME)
            {
                m_timer = 0.0f;
                m_alpha += 0.1f;
                m_image.color = new Color(1.0f, 1.0f, 1.0f, m_alpha);
            }
        }
    }

}
ではいつ使うのか?とお話ですが、
重い処理をさせるとき、
特にリソースのロードをするときに真価を発揮します。
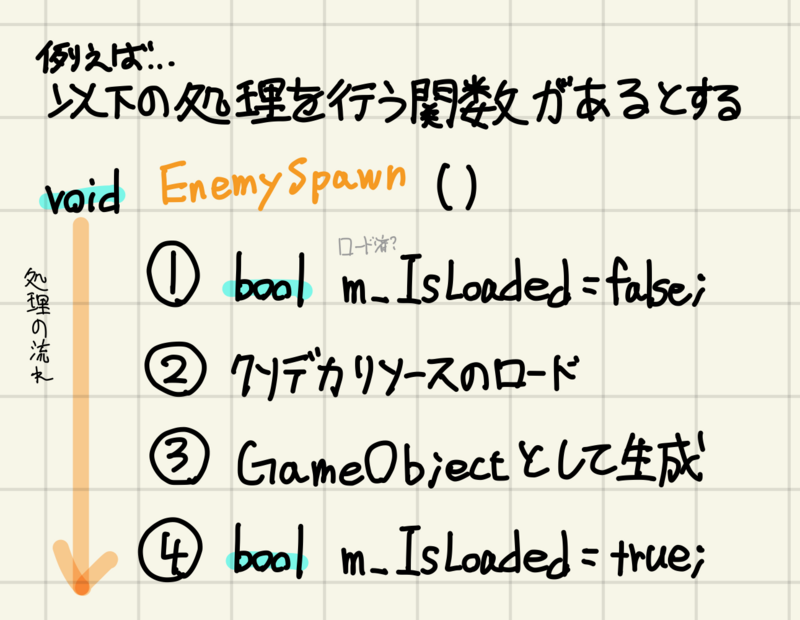
敵のスポーン処理をさせるscriptを作るとします。
処理の流れは以下の通り。

この処理がvoid関数内で行われようとすると、
1フレームの中ですべての処理が流れるため、結果として重くなってしまいます。

コルーチンを使うことで、
それぞれの処理を分散させることが出来るようになります!

また、コルーチンには1フレーム待つものだけでなく、
true/falseになるまで待てたり、
任意の秒数待つといったことも可能です。
true/falseになるまで待つ処理であれば、ローディング画面が作れそうです。
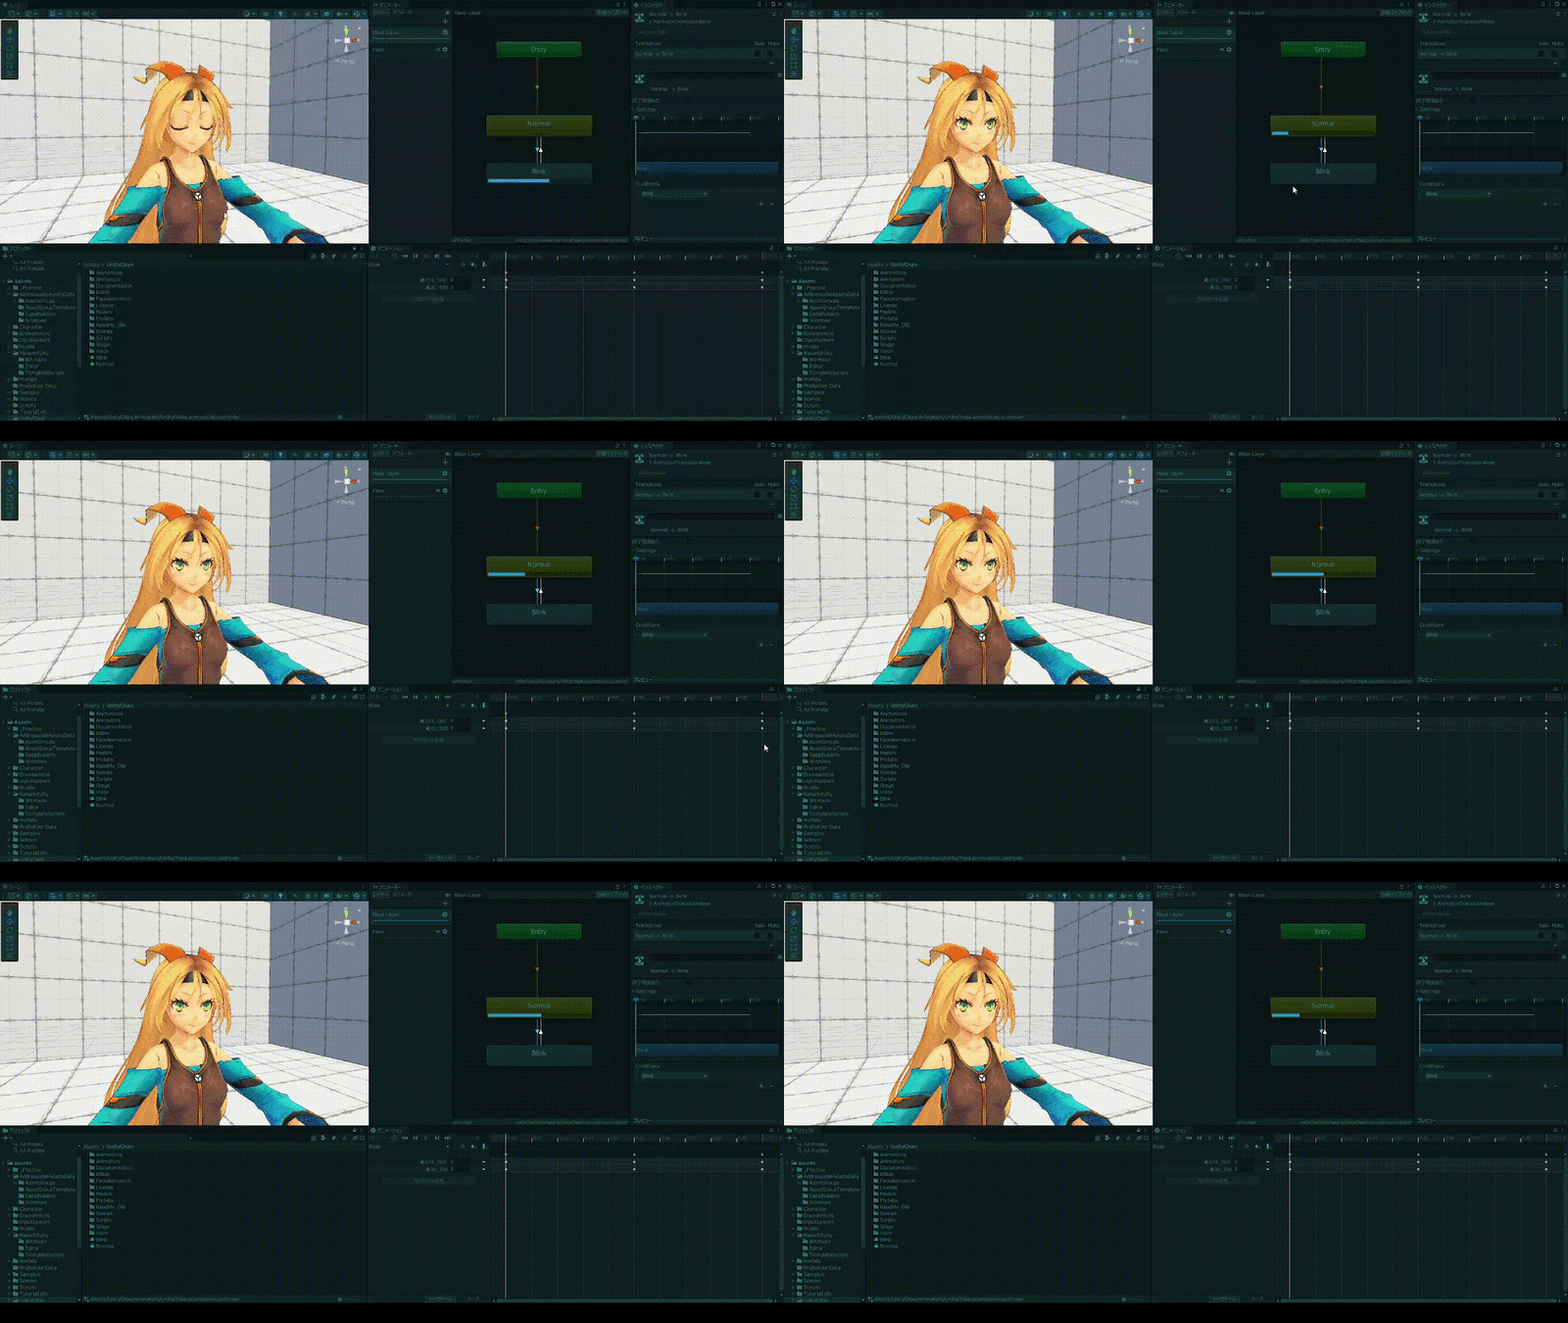
任意の秒数待つことが出来れば、アニメーションと合わせて
ある程度ランダムで瞬きを行うアニメーションを行うといったことが可能です。
/// <summary> 瞬きコルーチン </summary>
private IEnumerator Blink()
{
    Animator animator=GetComponent<Animator>();

    while (true)
    {
        // 瞬き
        animator.SetTrigger("Blink");

        // 次の瞬きまでのインターバル
        float waitSecond = Random.Range(0.1f, 1.0f);
        yield return new WaitForSeconds(waitSecond);
    }
}

コルーチンの開始・停止
MonoBehaviour .StartCoroutine
Coroutine StartCoroutine(IEnumerator routine)は、
引数に入れたIEnumerator型のコルーチンを開始させます。
docs.unity3d.com
using System.Collections;
using UnityEngine;

/// <summary> コルーチンサンプル </summary>
public class CoroutineExample : MonoBehaviour
{

    //-----------------------------------------------------------------------
    // Unityメゾット
    //-----------------------------------------------------------------------

    /// <summary> 初期化処理 </summary>
    private void Start()
    {
        StartCoroutine(AnyCoroutine());
    }

    //-----------------------------------------------------------------------
    // コルーチンメゾット
    //-----------------------------------------------------------------------

    /// <summary> テストコルーチン </summary>
    private IEnumerator AnyCoroutine()
    {
        Debug.Log("コルーチン開始");

        yield return null;

        Debug.Log("コルーチン終了");
    }

}
MonoBehaviour.StopCoroutine
void StopCoroutine(IEnumerator routine)は、
引数に入れたIEnumerator型のコルーチンを停止させます。
任意のタイミングで止めたいときに使用します。
docs.unity3d.com
using System.Collections;
using UnityEngine;

/// <summary> コルーチンサンプル </summary>
public class CoroutineExample : MonoBehaviour
{

    //-----------------------------------------------------------------------
    // Unityメゾット
    //-----------------------------------------------------------------------

    /// <summary> 初期化処理 </summary>
    private void Start()
    {
        // コルーチンの開始
        StartCoroutine(LoopCoroutine());
    }

    /// <summary> 更新処理 </summary>
    private void Update()
    {
        // コルーチンを止める
        if(Input.anyKeyDown)
        {
            StopCoroutine(LoopCoroutine());
        }
    }

    //-----------------------------------------------------------------------
    // コルーチンメゾット
    //-----------------------------------------------------------------------

    /// <summary> ループしているコルーチン </summary>
    private IEnumerator LoopCoroutine()
    {
        while(true)
        {
            Debug.Log("Loop!");

            yield return null;
        }
    }

}
MonoBehaviour .StopAllCoroutines
void StopAllCoroutines()は、
すべてのコルーチンを停止させます。
このスクリプトに張り付いているすべてのコルーチンを停止させるため、
扱いには注意が必要です。
docs.unity3d.com
using System.Collections;
using UnityEngine;

/// <summary> コルーチンサンプル </summary>
public class CoroutineExample : MonoBehaviour
{
    //-----------------------------------------------------------------------
    // Unityメゾット
    //-----------------------------------------------------------------------

    /// <summary> 初期化処理 </summary>
    private void Start()
    {
        // 複数コルーチンの開始
        StartCoroutine(LoopCoroutine());
        StartCoroutine(LoopCoroutine());
        StartCoroutine(LoopCoroutine());
    }

    /// <summary> 更新処理 </summary>
    private void Update()
    {
        // すべてのコルーチンを止める
        if(Input.anyKeyDown)
        {
            StopAllCoroutines();
        }
    }

    //-----------------------------------------------------------------------
    // コルーチンメゾット
    //-----------------------------------------------------------------------

    /// <summary> ループしているコルーチン </summary>
    private IEnumerator LoopCoroutine()
    {
        while(true)
        {
            Debug.Log("Loop!");

            yield return null;
        }
    }

}
yield
yieldは、コルーチン関数内で処理の中断・再開あるいは終了を判断するキーワードです。
yield return null
yield return null は、
1フレーム中断し、次のフレームで下の行から再開します。
/// <summary> サンプルコルーチン </summary>
private IEnumerator SampleCoroutine()
{
    Debug.Log("コルーチン開始");

    yield return null;

    Debug.Log("コルーチン終了");
}

yield return new WaitForSeconds(float seconds)
yield return new WaitForSeconds(float seconds)は、
引数に入れた秒数分中断し、次のフレームで下の行から再開します。
docs.unity3d.com
/// <summary> サンプルコルーチン </summary>
private IEnumerator SampleCoroutine()
{
    Debug.Log("コルーチン開始");

    // 3秒待つ
    yield return new WaitForSeconds(3.0f);

    Debug.Log("コルーチン終了");
}

yield break
yield break は、
その行に到達した時点でコルーチンを終了させます。
/// <summary> サンプルコルーチン </summary>
private IEnumerator SampleCoroutine()
{
    Debug.Log("コルーチン開始");

    yield break;

    Debug.Log("コルーチン終了");
}

yield return new WaitUntil(Func predicate)
yield return new WaitUntil(Func predicate) は、
引数に入れたbool型のデリゲードがtrueになるまで待ちます。
docs.unity3d.com
/// <summary> サンプルコルーチン </summary>
private IEnumerator SampleCoroutine()
{
    Debug.Log("コルーチン開始");

    yield return new WaitUntil(GetTrueFlg);

    Debug.Log("コルーチン終了");
}

/// <summary> フラグ </summary>
private bool GetTrueFlg()
{
    return true;
}
デリゲードとは、簡潔に説明すると関数を入れられる型です。
詳しくは過去の記事をご覧ください。
nasan-log.hatenablog.com
また、ラムダ式を使うことによってより簡素に扱えるようになります。 nasan-log.hatenablog.com
yield return new WaitWhile(Func predicate)
yield return new WaitWhile(Func predicate) は、
引数に入れたbool型のデリゲードがfalseになるまで待ちます。
早い話、WaitUntilの逆です。
yield return StartCoroutine()
yield return StartCoroutine() は、
指定したコルーチンが完了するまで待つ関数です。
別コルーチンの処理が完了するまで待てちゃいます。
/// <summary> サンプルコルーチン1 </summary>
private IEnumerator SampleCoroutine_1()
{
    Debug.Log("コルーチン1 開始");

    // コルーチン2の処理終了まで待つ
    yield return SampleCoroutine_2();

    Debug.Log("コルーチン1 終了");
}

/// <summary> サンプルコルーチン2 </summary>
private IEnumerator SampleCoroutine_2()
{
    Debug.Log("コルーチン2 開始");

    // 3秒待つ
    yield return new WaitForSeconds(3.0f);

    Debug.Log("コルーチン2 終了");
}

その他
その他特筆すべき事項が2つほど。
アクティブ状態でのコルーチン
GameObjectが非アクティブになると全てのコルーチンが終了します。 Scriptが非アクティブの場合は終了しません。

Scriptのみを非アクティブ状態にしたい場合は、 必ずStopCoroutine()などを使って停止させておきましょう。
戻り値・引数について
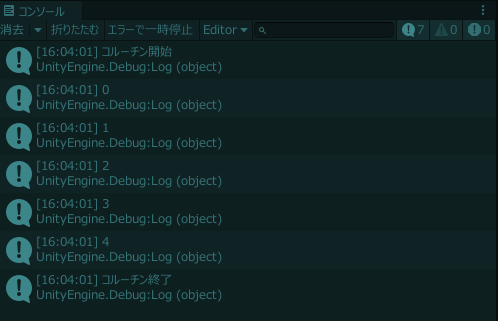
以下のように、引数を使うことが出来ます。 ただし、「ref」・「out」が使用できません。
using System.Collections;
using UnityEngine;

/// <summary> コルーチンサンプル </summary>
public class CoroutineExample : MonoBehaviour
{
    //-----------------------------------------------------------------------
    // Unityメゾット
    //-----------------------------------------------------------------------

    /// <summary> 初期化処理 </summary>
    private void Start()
    {
        // コルーチンの開始
        StartCoroutine(SampleCoroutine(5));
    }

    //-----------------------------------------------------------------------
    // コルーチンメゾット
    //-----------------------------------------------------------------------

    /// <summary> サンプルコルーチン </summary>
    private IEnumerator SampleCoroutine(int maxNum)
    {
        Debug.Log("コルーチン開始");

        // カウント
        for (int i = 0; i < maxNum; i++)
        {
            Debug.Log(i.ToString());
            yield return null;
        }

        Debug.Log("コルーチン終了");
    }

}

また、戻り値も使用できません。 voidで返せる関数のみになります。